
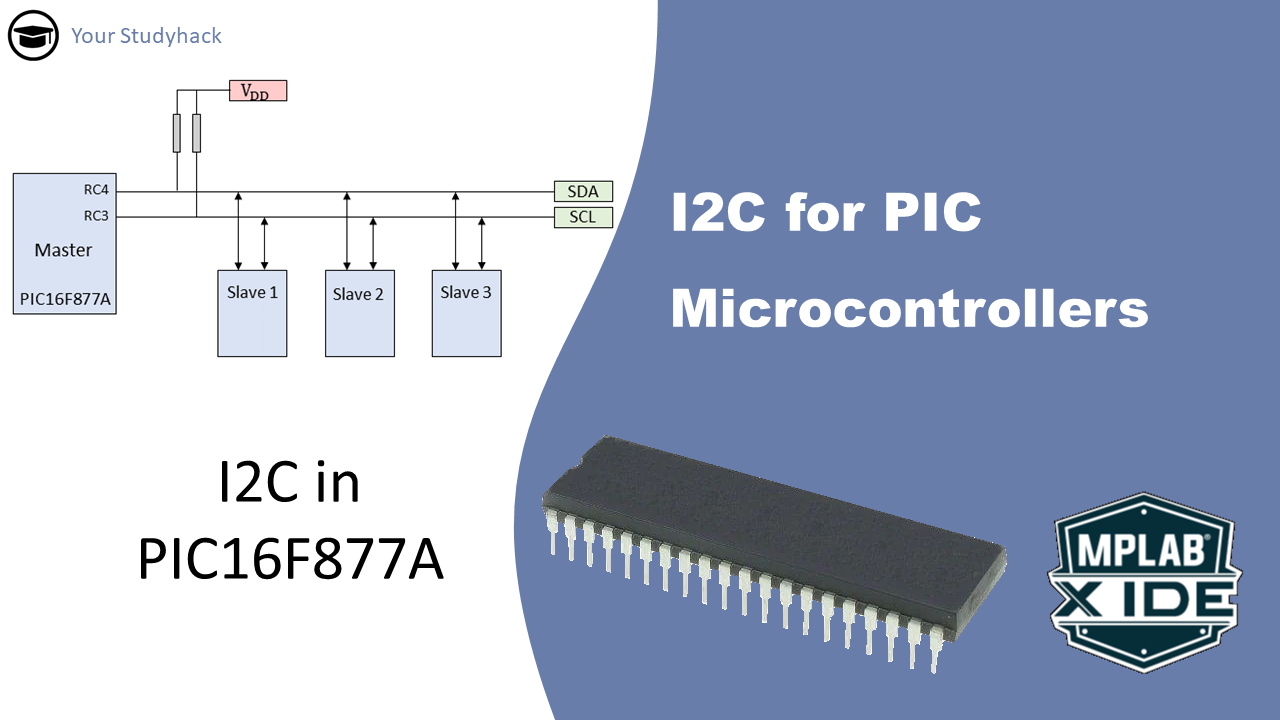
I2C for PIC Microcontrollers
In this article, we will take a closer look at the I2C serial communication protocol. This is the second in a series of three articles covering serial communication; the others focus on USART and SPI. In this post we will explain what I2C is, how it functions, and how you ...
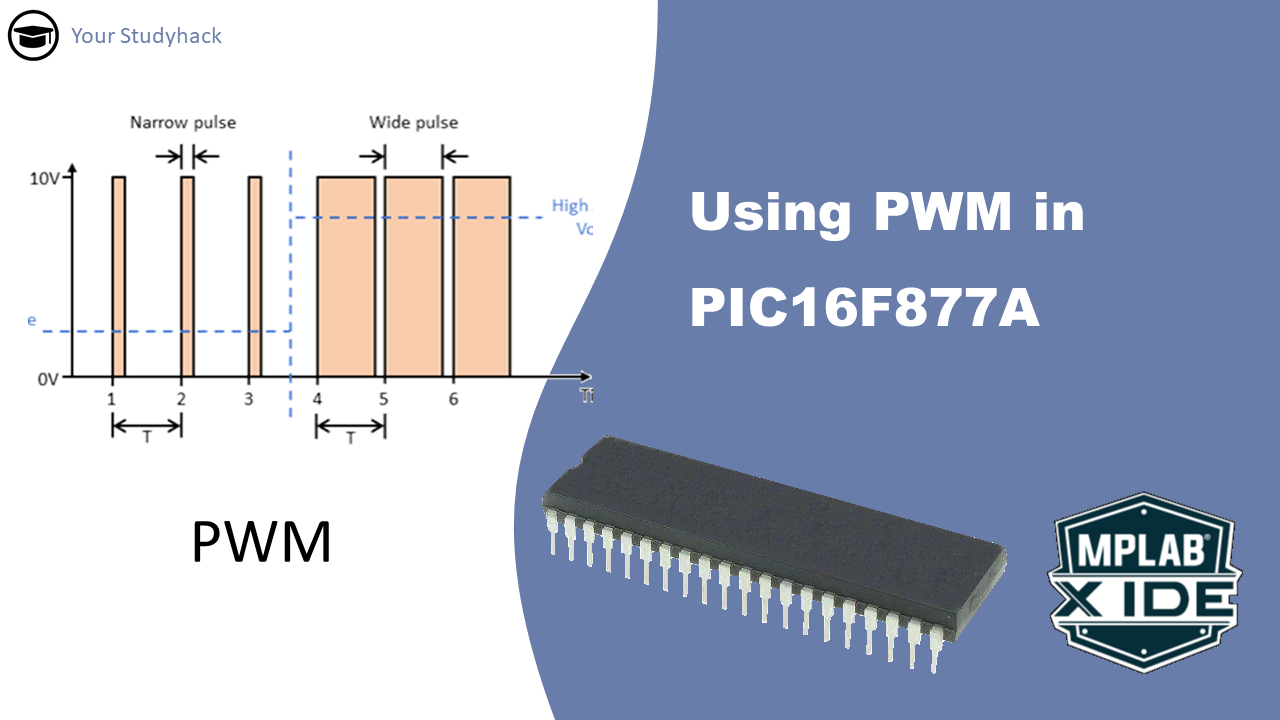
Using PWM in PIC16F877A
Digital signals (0 or 1) and analog signals (range of values) are both used in electronics. Analog inputs can be converted to digital through an ADC. To control analog devices with a microcontroller, DACs are used but they're costly and space-consuming. PWM (Pulse Width Modulation) is a cost-effective technique that ...
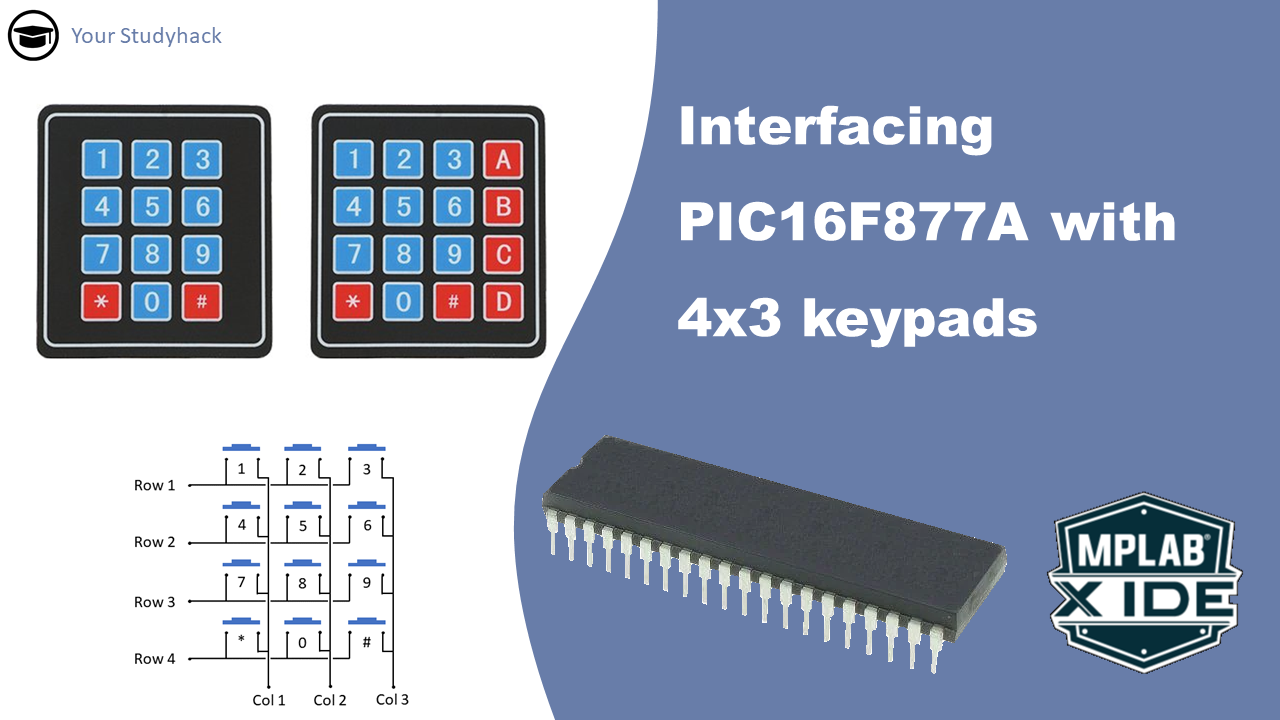
Interfacing 4×3 keypads with PIC16F877A
In this tutorial, we will provide an overview of the 4x3 membrane keypad. The keypad serves as a reliable and budget-friendly tool for having inputs in your project. Understanding how to interface with the keypad will prove useful in future projects that require menu selection or similar inputs. Our guide ...
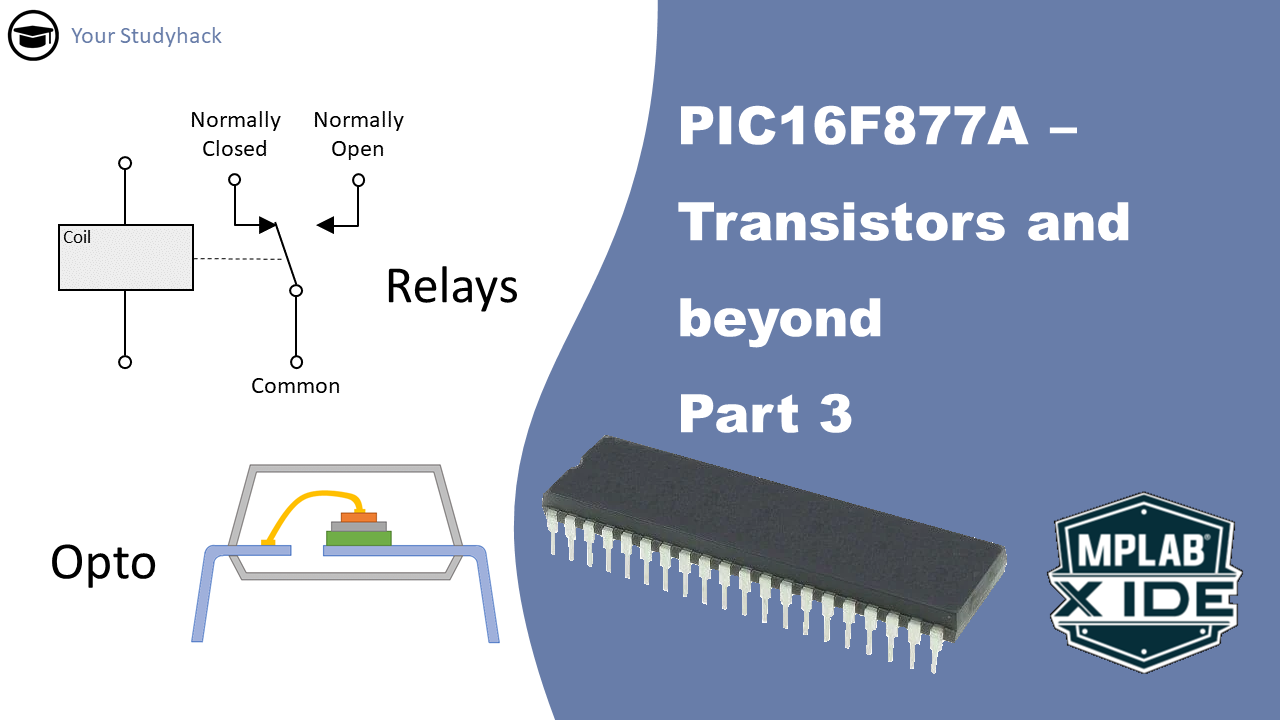
Control Possibilities with PIC16F877A: Relays, Optos, H Bridges (Part 3 of 3)
Most microcontrollers have limited current sink or current source on their pins, including the PIC16F877A. However, certain projects may require larger currents than the maximum current source of 25mA for this microcontroller. As discussed in the previous two parts of this series, Bipolar Junction Transistors and MOSFETs can be used ...
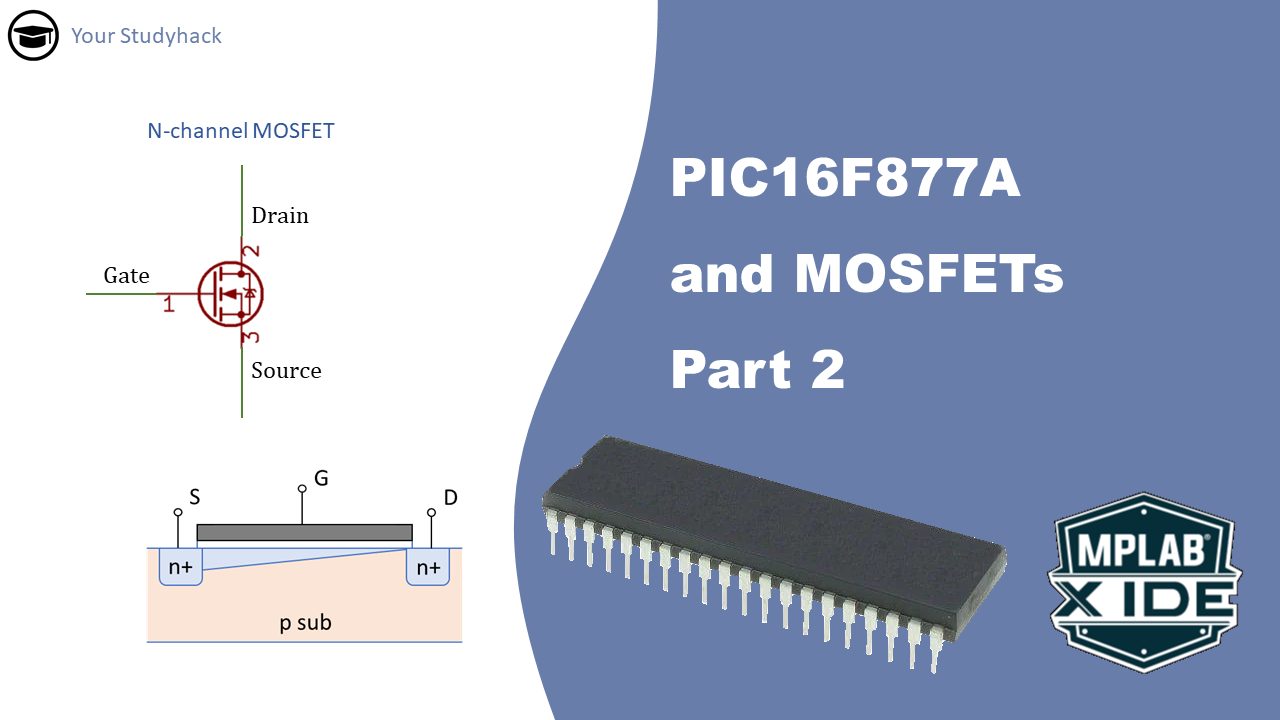
Interfacing PIC16F877A with MOSFETS (Part 2 of 3)
Most microcontrollers have a limited current sink or current source on the pins, the PIC16F877A is no exception. However, for certain projects you may want to use larger currents then just 25mA, which is the max current source for this microcontroller. For those kind of projects you'll have to resort ...
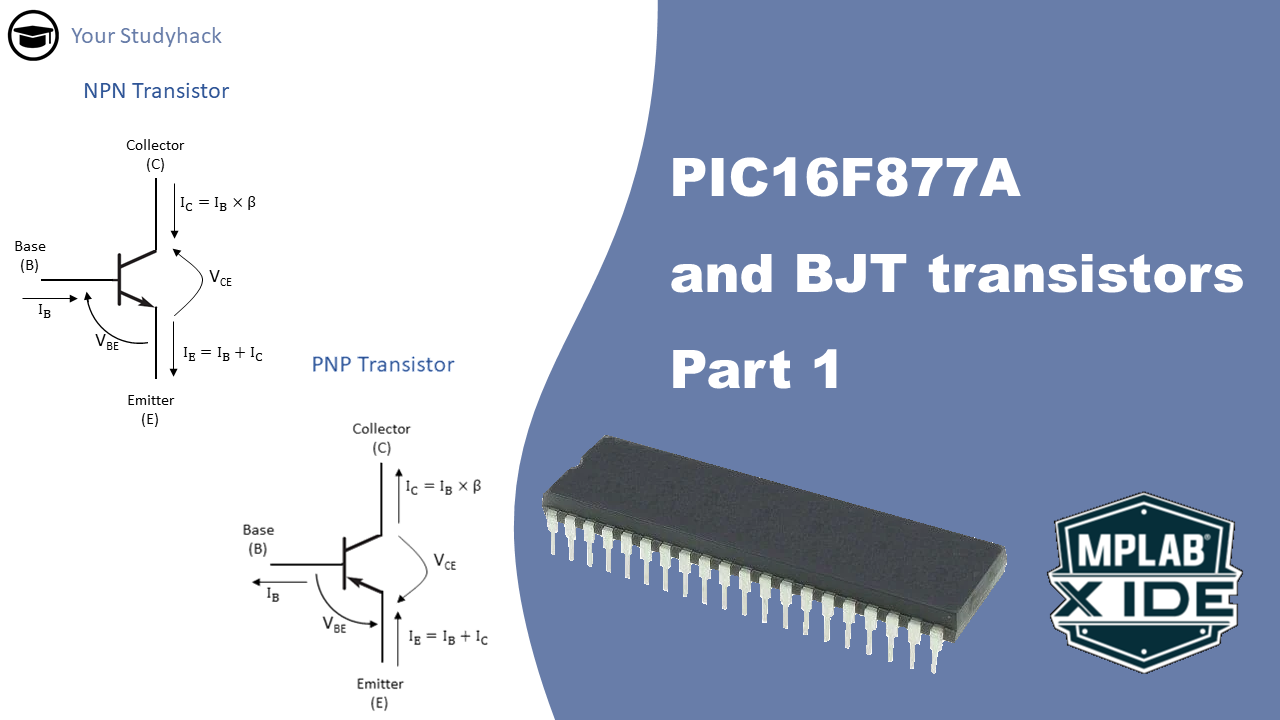
Interfacing PIC16F877A with transistors (Part 1 of 3)
Most microcontrollers have a limited current sink or current source on the pins, the PIC16F877A is no exception. However, for certain projects you may want to use larger currents then just 25mA, which is the max current source for this microcontroller. For those kind of projects you'll have to resort ...
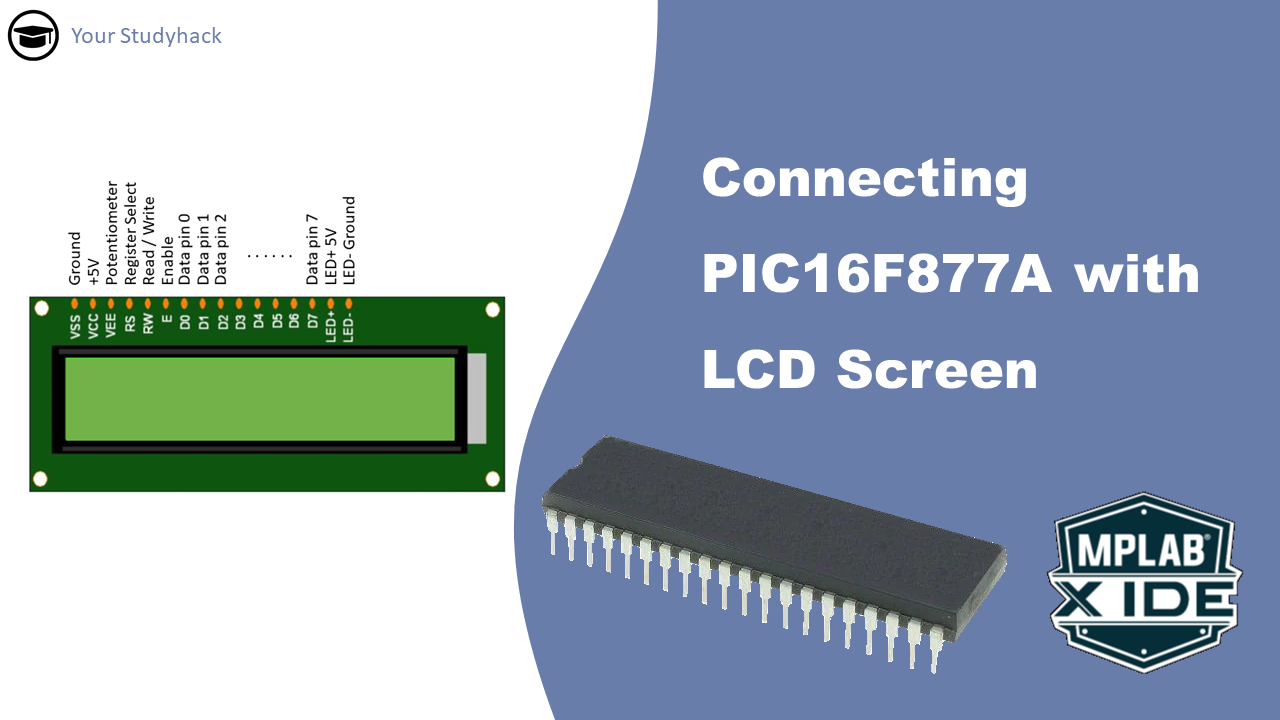
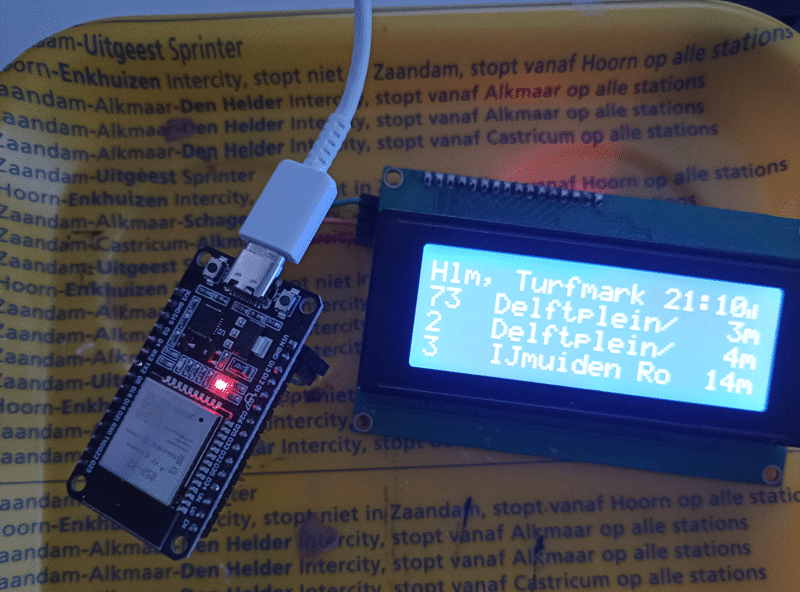
Connecting PIC16F877A with an LCD screen
In this tutorial we will see what an LCD-screen is, how it works and how it is used. We will continue by connecting it to the PIC16F877A microcontroller with its GPIOs in 8-bit mode. Later on, we will take a quick look at the 4-bit mode, so both can be ...
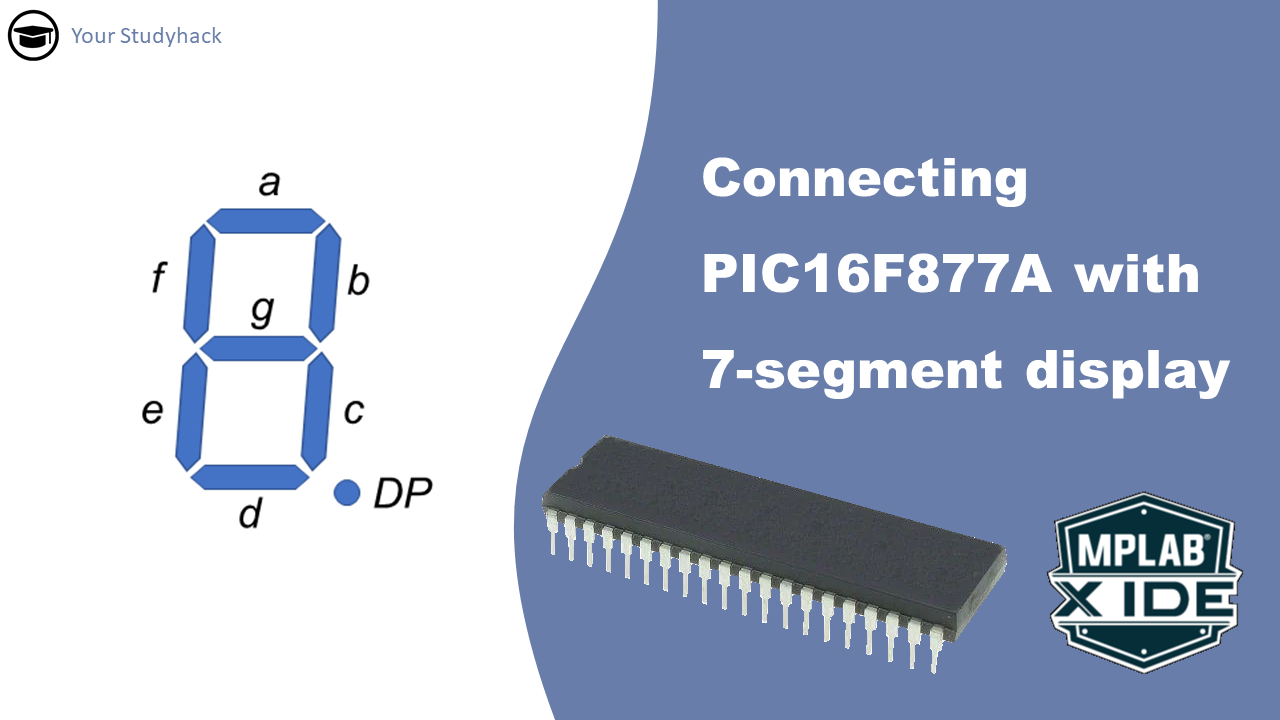
Connecting PIC16F877A with 7-Segment display
In this tutorial we will see what a 7-Segment display is, how it works and what it is used for. We will continue by connecting it to the PIC16F877A microcontroller, using its GPIO pins.
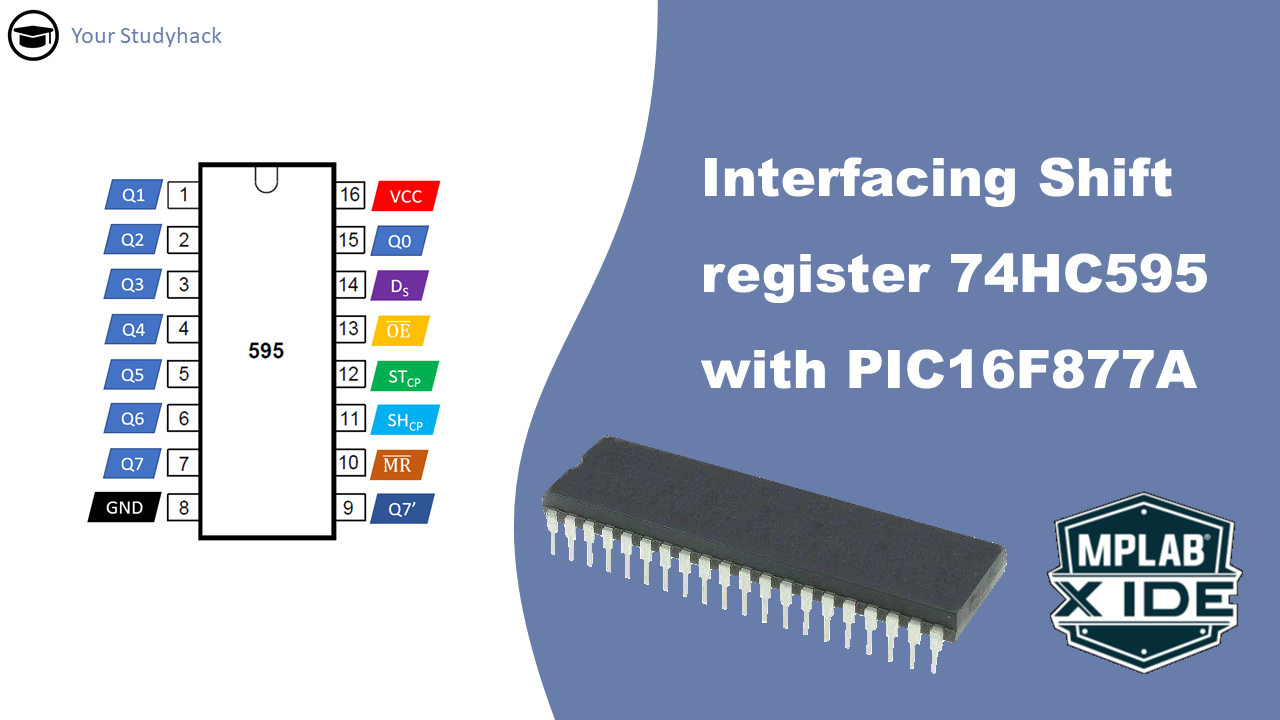
74HC595 Shift Register interfacing with PIC16F877A
In this tutorial, we will discuss how to interface a 74HC595 Shift Register with a PIC microcontroller. The 74HC595 is a popular integrated circuit (IC) that serves as a shift register with output latches. It is often used in digital electronics and microcontroller projects to expand the number of output ...
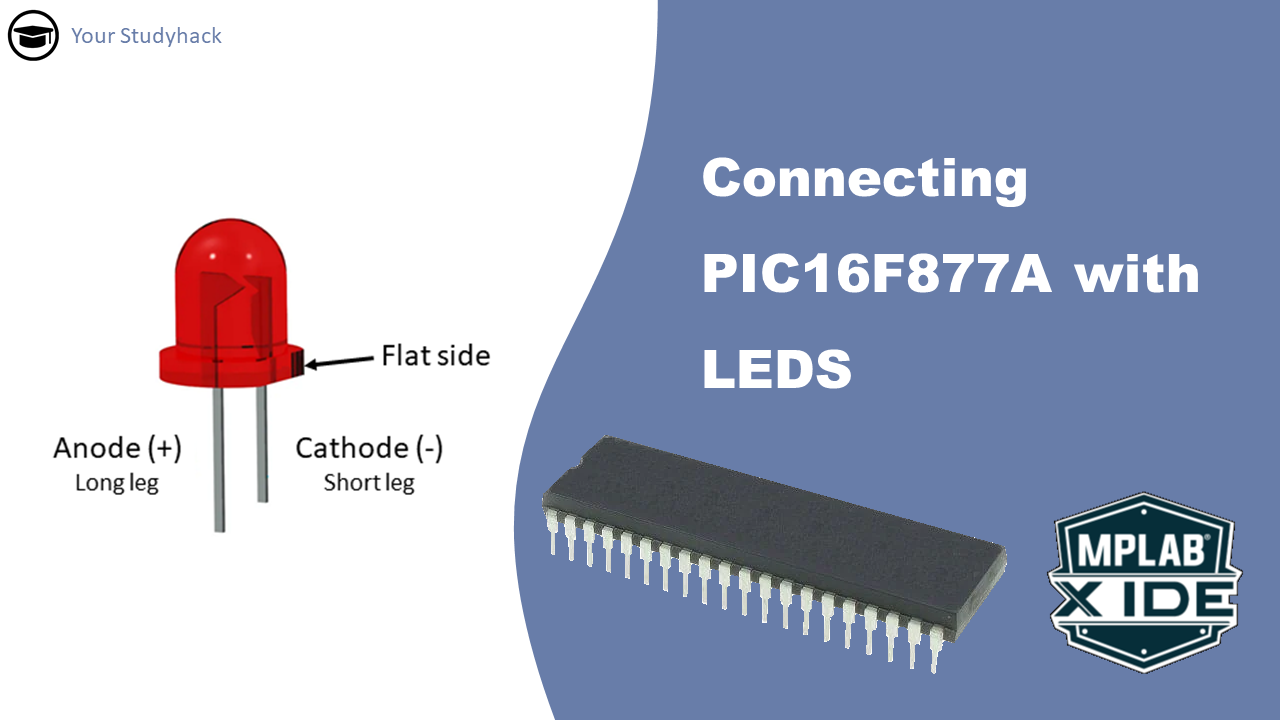
Connecting PIC16F877A with LEDs
In this tutorial we will explore the concept of connecting your microcontroller with LEDs. This exercise is ideal for beginners who want to gain insight into the practical application of a microcontroller. Throughout the tutorial, you will learn fundamental skills such as configuring GPIO and programming the MCU to blink ...