Introduction
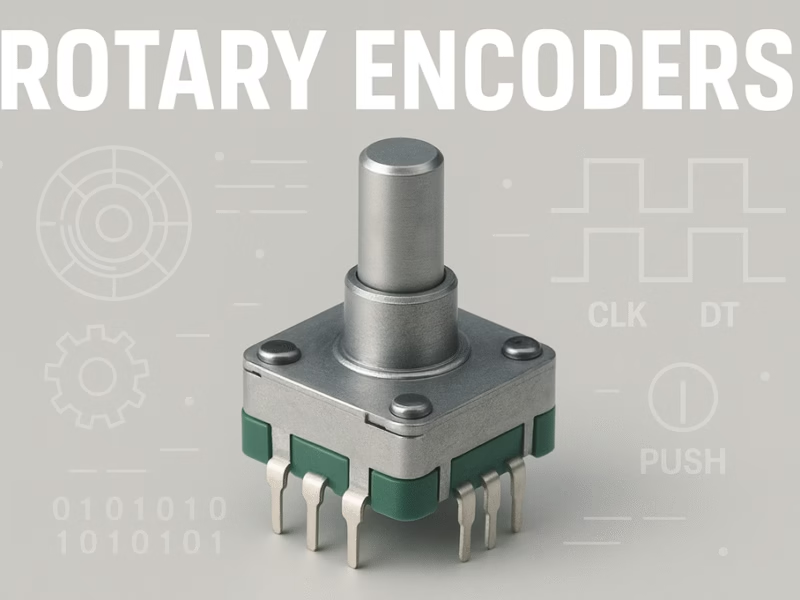
A rotary encoder may look like a simple knob, but it plays a vital role in many electronic systems, from adjusting audio levels to tracking motor movement or controlling CNC machines. It converts rotational motion into digital pulses that a microcontroller can count to determine how far and in which direction something has turned.
Table of Contents
Unlike potentiometers, rotary encoders allow for infinite rotation, there are no end stops. Most produce clean digital signals, often with tactile detents (clicks) for feedback, and many include a built-in push button. The number of unique steps generated during a full turn varies by model, allowing for coarse or fine control. With a range of mechanical or optical designs, rotary encoders are valued for their simplicity, precision, and durability in both hobby projects and industrial equipment.

Fundamentals of Rotary Encoding
Rotary encoding is at the heart of countless control systems, from precision machinery to everyday electronics. It provides the signals that let devices track movement, measure rotation, and respond with accuracy.
Rotary Encoder vs Potentiometer
A common analogy is to compare a rotary encoder to a bicycle odometer and a potentiometer to a steering wheel. A steering wheel (like a potentiometer) tells you the absolute position—it turns only so far left or right before it stops. An odometer (like a rotary encoder) doesn’t care where you start; it counts each rotation to tell you how far you’ve traveled. In a similar way, encoders report movement, not position, unless they are specially designed absolute devices.
Types of Rotary Encoders
From simple motion tracking to high-precision positioning, rotary encoders come in designs for all needs. The two main categories “incremental and absolute” I explain here.
Incremental Encoders
An incremental encoder only outputs a stream of pulses that represent changes in its position. What it does not know, is its absolute position. A microcontroller can count pulses from a known reference, such as the moment the system powers on. This type of encoder is popular, as they are inexpensive and simple to interface. Industrial incremental encoders use precision glass discs and photodiodes to achieve high resolution and speeds. In hobby modules, the mechanical versions can bounce (generate multiple transitions per step) and require debouncing.
Two concentric rings allow the encoder to output two signals (A and B) that are slightly phase-shifted. This phase difference is used to determine direction, by checking which channel changes first, it tells if you’re turning clockwise or counterclockwise.

Advantage:
- Simple to implement.
- Low cost (especially mechanical types).
- Good for relative measurements and menu controls.
Disadvantages:
- Cannot provide position after a power loss (must “home” to a reference).
- More susceptible to noise and bouncing (mechanical types).
Absolute Encoders
An absolute encoder outputs a unique binary code for each physical position. This can be achieved using an optical disc with concentric rings or a magnetic sensor array. Each position produces a distinct binary pattern, often based on Gray code or quadrature, that never repeats within one revolution.
This allows the microcontroller to immediately determine the exact position, even after a power cycle. Absolute encoders are widely used in robotics, CNC machines, and industrial automation; environments where position loss could be critical.
As shown in Figure 3, increasing the number of tracks or rings improves resolution and accuracy.

Advantages:
- Provides true position without counting pulses.
- Retains position when power is removed.
- High precision and reliability.
Disadvantages:
- More expensive and complex.
- Interface may require multiple data lines or serial protocols.
Other types
While this article focuses on rotary encoders, encoders also come in linear form, used to measure linear displacement (e.g., on sliding axes).
Common technologies include:
- Optical encoders: light passes through slotted disks.
- Magnetic encoders: use Hall-effect sensors and magnets.
- Conductive encoders: use resistive tracks for position sensing.
Each technology has trade-offs in terms of resolution, ruggedness, and cost. When selecting an encoder module, consider environmental factors such as dust, moisture, and temperature, as well as the required resolution and speed.
Signals & Decoding
Encoders produce digital signals that represent their position. Depending on the type of encoder (incremental or absolute), these signals follow different formats. This section explains the basics of quadrature signals and Gray code, and how to decode them.
Quadrature Signals (Incremental Encoder)
Imagine a circular disc with evenly spaced slots. A light sensor detects when light passes through a slot, generating a digital pulse. If you place two concentric circles, with the inner one slightly offset, each sensor sees the slot at a different time, producing two square waves: Channel A and Channel B. This is shown in Figure 4.
These two signals are out of phase (typically by 90°). This is called a quadrature signal.
- If A leads B, the encoder is rotating clockwise.
- If B leads A, it’s rotating counter-clockwise.

Each transition (rising or falling edge) counts as a step. This allows the microcontroller to measure both distance and direction. Quadrature decoding is often done using interrupts or state machines that track transitions like:
					/*Channel A triggers an interrupt on its rising edge.
   Channel B is sampled immediately to determine direction:
        If B is LOW when A rises → Clockwise
        If B is HIGH → Counter-clockwise*/
volatile int position = 0;

void setup() {
  pinMode(2, INPUT);  // Channel A
  pinMode(3, INPUT);  // Channel B
  attachInterrupt(digitalPinToInterrupt(2), handleA, RISING);  // Trigger on A rising
}

void handleA() {
  bool bState = digitalRead(3);  // Read channel B
  if (bState) {
    position--;  // B is high → CCW
  } else {
    position++;  // B is low → CW
  }
}

void loop() {
  // Optional: use position value here
}
Gray Code (Absolute Encoders)
Absolute encoders assign a unique binary value to each physical position. However, when using standard binary encoding, transitions between positions can cause multiple bits to change at once. This can lead to incorrect readings if not all bits are sampled at the exact same time.
To solve this, absolute encoders often use Gray code, a binary sequence in which only one bit changes per step. This reduces the chance of read errors caused by electrical noise or slight timing mismatches. This is not the same as binary code, which is shown in the table.
Looking back to Figure 3, which shows an encoder disc with four concentric rings and four fixed sensors (arrows). As the disc rotates, the sensors detect a 4-bit Gray code. Because only one bit changes per step, the encoder provides a smooth, glitch-free transition between positions.
However, the position of the bit that changes does not indicate direction. Gray code is designed only to minimize error, not to encode rotation direction inherently. To determine the direction, the system must compare the current and previous Gray code values and map them against a known sequence (e.g. using a lookup table or binary decoding). If the values advance in order, the disc is turning one way; if they reverse, it’s turning the other.
| Binary | Gray |
|---|---|
| 000 | 000 |
| 001 | 001 |
| 010 | 011 |
| 011 | 010 |
| 100 | 110 |
| 101 | 111 |
| 110 | 101 |
| 111 | 100 |
Edge detection methods
To decode a quadrature signal, you need to detect edges, transitions from LOW to HIGH or HIGH to LOW, on one of the encoder channels. Then, by checking the state of the other channel, you determine the direction of rotation.
There are several methods to implement this, from basic polling to high-performance interrupts.
Polling Method
The simplest method continuously reads both channels in the loop() and compares the current state with the previous one. Here’s a minimal example for Arduino:
					//This is called 1x decoding — one count per full step.
 //It's CPU-light but may miss steps at high speeds.
int lastState = 0;
int position = 0;

void loop() {
  int A = digitalRead(2);
  int B = digitalRead(3);
  int state = (A << 1) | B;

  if (state != lastState) {
    if ((lastState == 0b00 && state == 0b01) ||
        (lastState == 0b01 && state == 0b11) ||
        (lastState == 0b11 && state == 0b10) ||
        (lastState == 0b10 && state == 0b00)) {
      position++;  // Clockwise
    } else {
      position--;  // Counter-clockwise
    }
    lastState = state;
  }
}
Debouncing
Mechanical encoders can produce noisy transitions due to contact bounce, which leads to false counts. To mitigate this:
Software debouncing: Add a delay after detecting a change, or use a state machine with a lookup table. Libraries like Buxtronix’s rotary encoder handle this well.
Hardware debouncing: Use an RC filter + Schmitt trigger to clean up signals before they reach the microcontroller. Some modules already include this circuitry.
Interrupt Method
For fast-spinning encoders (e.g. motors or wheels), interrupts are more reliable. Attach an interrupt to Channel A, and read Channel B inside the ISR to determine direction.
					//Keep ISR code short. Avoid Serial.print() or delays — do heavy work in loop()
volatile int position = 0;

void setup() {
  pinMode(2, INPUT);  // Channel A
  pinMode(3, INPUT);  // Channel B
  attachInterrupt(digitalPinToInterrupt(2), onAChange, RISING);
}

void onAChange() {
  if (digitalRead(3)) {
    position--;  // B is high → CCW
  } else {
    position++;  // B is low → CW
  }
}
Using Encoders in Projects
With the right wiring, code, and setup, these rotary encoders can turn rotation into reliable digital feedback for any project.
Choosing the right encoder
Keep these points in the back of your mind when getting a rotary encoder:
- Pulses Per Revolution (PPR) – More pulses = finer resolution but higher CPU load. Example: 600 PPR with 4× decoding → 2400 counts/rev.
- Technology – Mechanical (cheap, bouncy), Optical (precise, clean), Magnetic (rugged, dirt/moisture-tolerant).
- Detents – Clicks for tactile UI feedback; smooth rotation for precise/continuous control.
- Push Button – Many modules include a shaft-press switch for select/reset functions (SW pin).
- Mounting/Form Factor – Panel-mount for enclosures, breakout boards for prototyping; some include built-in debouncing.
- Environment – Use sealed optical or magnetic in dirty/wet/vibrating areas; avoid exposed mechanical types.
Wiring and Program
Most hobby encoders have:
- 3 output pins: Channel A (CLK), Channel B (DT), and SW (switch)
- 2 power pins: GND and VCC/+ (typically 5V)
| Encoder Pin | Microcontroller | Function |
|---|---|---|
| CLK (A) | Digital pin 2 | Channel A (interrupt) |
| DT (B) | Digital pin 3 | Channel B |
| SW | Digital pin 4 | Push button (optional) |
| VCC | 5V | Power |
| GND | GND | Ground |
Conclusion
Rotary encoders are versatile devices that translate rotational motion into digital information. Understanding the difference between incremental and absolute encoders, the nature of quadrature signals, and how to decode direction are fundamental skills for any engineer working with motion control or user interfaces. By combining simple Arduino code, proper debouncing, and careful selection of hardware, you can integrate encoders into your own projects with confidence. From robots navigating a living room to industrial machines building airplanes, rotary encoders quietly ensure that motion is measured accurately and reliably. With the knowledge and examples provided here, you’re now ready to turn that knob and start measuring rotation with precision.
Tips and Considerations
Before integrating an encoder, keep these considerations in mind:
- Debounce properly
Mechanical encoders generate noisy signals, use hardware RC filters or debounce logic in software to avoid false counts. - Use pull-up resistors
Many modules require pull-up resistors on output pins. If not present, enable your microcontroller’sINPUT_PULLUPmode. - Plan resolution carefully
A 20 PPR encoder with 4× decoding results in 80 counts per revolution. Ensure your code and hardware can handle the expected pulse frequency. - Keep ISRs short
When using interrupts, avoid delays orSerial.print()inside the ISR. Instead, store changes involatilevariables and process them in the main loop. - Handle power-loss scenarios
Incremental encoders lose position after power loss. Use a homing routine or store values in EEPROM. Absolute encoders avoid this entirely. - Use libraries
Use encoder libraries that manage Gray code decoding, debouncing, and state transitions — especially for complex setups or noisy signals.
Florius
Hi, welcome to my website. I am writing about my previous studies, work & research related topics and other interests. I hope you enjoy reading it and that you learned something new.
More Posts